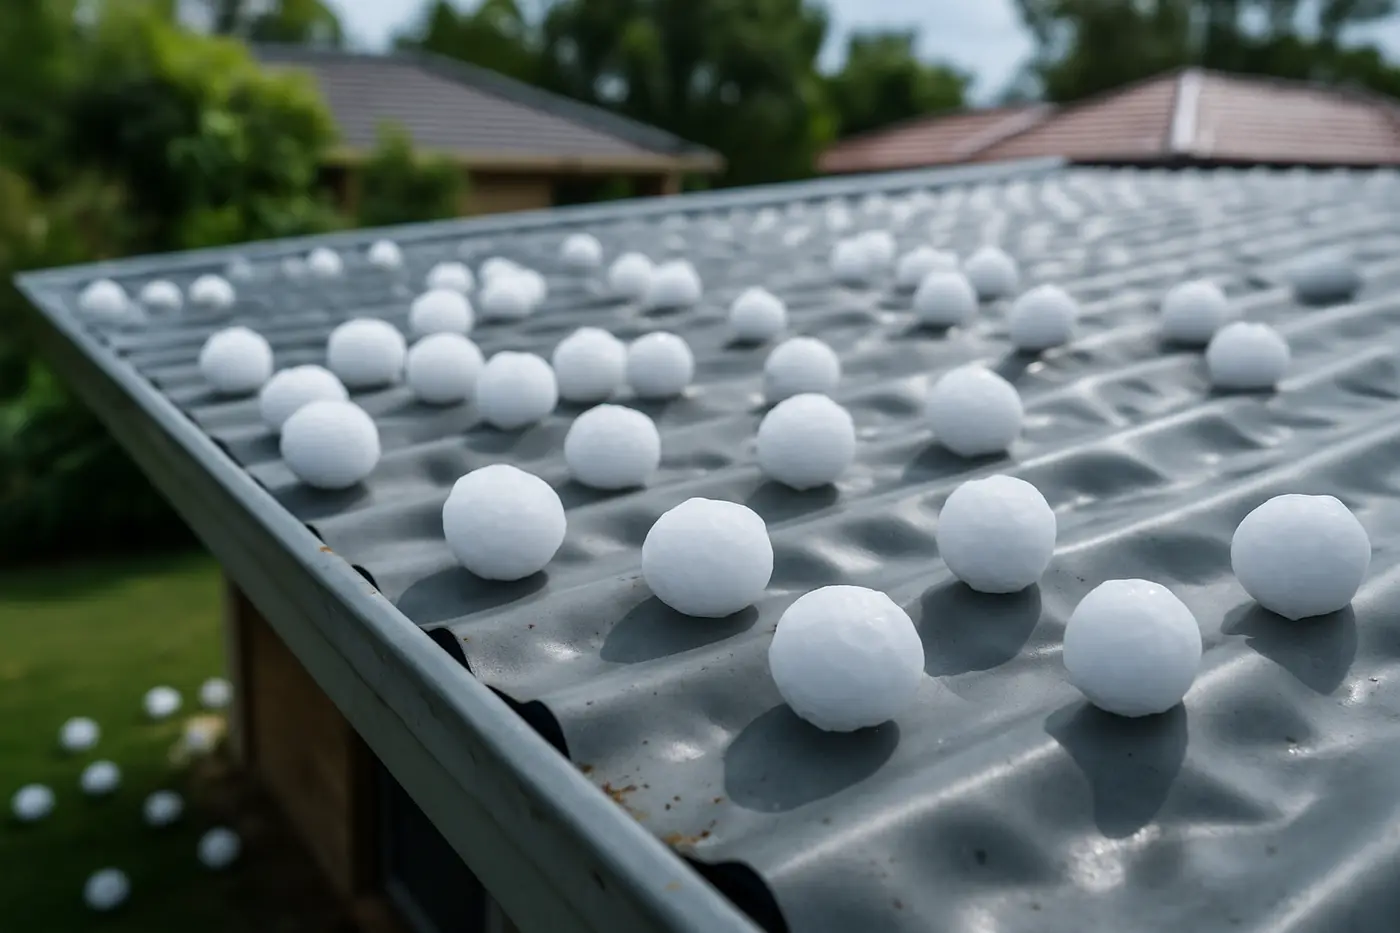
Brisbane knows what serious hail does to roofs. The supercell of 27 November 2014 dropped hailstones bigger than cricket balls across the CBD and inner suburbs, damaged tens of thousands of properties, and generated one of the largest insurance events in Queensland’s history — with repair queues that ran well over a year. Smaller hail cells hit parts of south-east Queensland most storm seasons.
Hail claims are also the most contested roof claims going, because hail damage is frequently invisible from the ground and slow to show itself. This guide walks the process end to end, in the order it actually happens.
Step 1 — Make the roof safe (and keep every receipt)
If hail has punched holes, cracked tiles, or smashed skylights, your first obligation under the policy is to prevent further damage.
- For emergency help during severe weather — trees down, major structural damage — call the SES on 132 500.
- For everything else, a private roofer can tarp and make safe. Ring your insurer’s claim line first if you can: most authorise reasonable emergency make-safe costs up to a stated limit, and confirming that on a recorded call avoids arguments later.
Keep every invoice. Make-safe costs form part of the claim. A proper storm damage roof repair make-safe — tarps battened down, broken tiles bagged and kept as evidence — also protects the claim itself, because secondary water damage from a badly tarped roof is much harder to attribute cleanly.
Step 2 — Document the evidence before it disappears
Hail is unusual among perils: the proof melts. On the day:
- Photograph hailstones next to a coin, tape measure, or your hand, ideally on your own property.
- Photograph dents in gutters, downpipes, flyscreens, air-conditioner fins, the car, the garden — the whole pattern of impact establishes hail size and direction.
- Photograph and video any active leaks and all interior damage before cleaning up.
- Note the exact time. Bureau of Meteorology radar records will place the cell over your suburb.
In the following days, get ground-level photos of the roof (zoom or a drone if you have one) showing displaced or shattered tiles, and keep any broken pieces. Don’t let anyone dispose of damaged material until the assessor has seen it or told you in writing they don’t need to.
Step 3 — Lodge the claim
Lodge online or by phone as soon as practicable. You’ll need your policy number, the date and time of the storm, a description of the damage, and your photos. You’ll receive a claim number — quote it on everything from here on.
Two things worth doing at lodgement: ask what the policy’s excess is and how it’s collected, and ask whether the insurer intends to send its own assessor, appoint a builder to scope, or request quotes from you. Insurers run different models and it changes your next move.
Step 4 — The assessor’s scope vs your roofer’s scope
Here is where hail claims are won and lost. The insurer will produce a scope of works — the list of damage they accept and the repairs they’ll pay for. It might come from a staff assessor, a contracted loss adjuster, or a partner builder.
Get your own scope in parallel. A licensed roofer who actually walks the roof will find what a time-pressed assessor working through a post-storm backlog can miss: hairline fractures in concrete tiles that only show when lifted, bruised coating on metal sheets that will rust in two summers, cracked pointing along ridge lines, dented flashings and skylight domes. On tiled roofs especially, the difference between “replace 14 visible broken tiles” and the real scope can be an order of magnitude — our tile roof repair inspections after hail events routinely find several times the damage visible from the ground.
Compare the two scopes line by line before you accept anything. You are under no obligation to accept the first scope offered.
Step 5 — Choose: insurer-managed repair or cash settlement
Once a scope is agreed, most Queensland insurers offer one of two paths:
Insurer-managed repair. The insurer’s builder or panel roofer does the work. Upside: the insurer typically guarantees the workmanship for a stated period, and cost overruns are their problem. Downside: you don’t choose the contractor, post-event queues can be long, and scope disputes mid-job are between you and a builder answerable to the insurer.
Cash settlement. The insurer pays you the scoped amount and you arrange repairs yourself. Upside: you choose your roofer and your timing. Downside: the risk transfers to you — if the settlement was based on a thin scope or panel rates your chosen roofer can’t match, the gap is yours, and hidden damage found later can be harder to reopen. Never accept a cash figure without a real quote from your own licensed roofer against the full scope; and check whether accepting affects your cover or the insurer’s lifetime guarantee on repairs.
Neither is universally right. Cash settling a straightforward metal re-sheet with a roofer you trust often works out well; cash settling a complex tiled roof off a desktop scope rarely does.
Step 6 — If you disagree: the dispute path
If the insurer declines the claim or offers a scope you believe is short, the path is well defined:
- Ask for the reasons in writing, including the assessor’s report.
- Counter with evidence: your roofer’s written report and photos addressing each disputed point, plus BOM data for the event. “Wear and tear” declines fall over when fresh fracture faces and directional dent patterns are documented properly.
- Lodge an internal dispute — every insurer has a formal internal dispute resolution process with mandated response timeframes under the General Insurance Code of Practice.
- Escalate to AFCA. The Australian Financial Complaints Authority is free for consumers and its determinations bind the insurer.
Most short-scope disputes settle at step 2 or 3 once real evidence is on the table. Stay factual, keep everything in writing, and keep the roof protected throughout.
Step 7 — Supplementary claims for hidden damage
Hail’s nastiest habit is delayed disclosure. Repairs begin and the roofer finds forty more fractured tiles under the lifted courses, or a ceiling opened for painting reveals saturated insulation, or a slow leak appears at the first big rain after “completed” repairs.
This is what supplementary claims are for. You lodge the newly discovered damage under the original claim number, linked to the same event. To make one stick:
- Stop work and photograph the discovery in place before disturbing it.
- Have your roofer state in writing why the damage is attributable to the original hail event and why it wasn’t visible at the original assessment.
- Notify the insurer promptly — don’t repair first and claim after without authorisation.
There’s no fixed deadline that extinguishes genuinely hidden storm damage, but the longer the gap, the heavier the evidentiary lifting, which is another reason to have a thorough independent scope done early.
The short version
Make safe and keep receipts. Photograph the hail, the pattern of impact, and everything else before it melts or gets cleaned up. Lodge fast. Get your own on-roof scope before accepting the insurer’s. Choose cash settlement only against a real quote. Dispute short scopes in writing, escalate to AFCA if needed, and use supplementary claims when hidden damage surfaces.
If hail has been over your suburb this season — even if the roof looks fine from the driveway — book a free roof inspection online. A written, photographed scope from a licensed roofer costs you nothing and is the single most useful document you can hold through every step above.