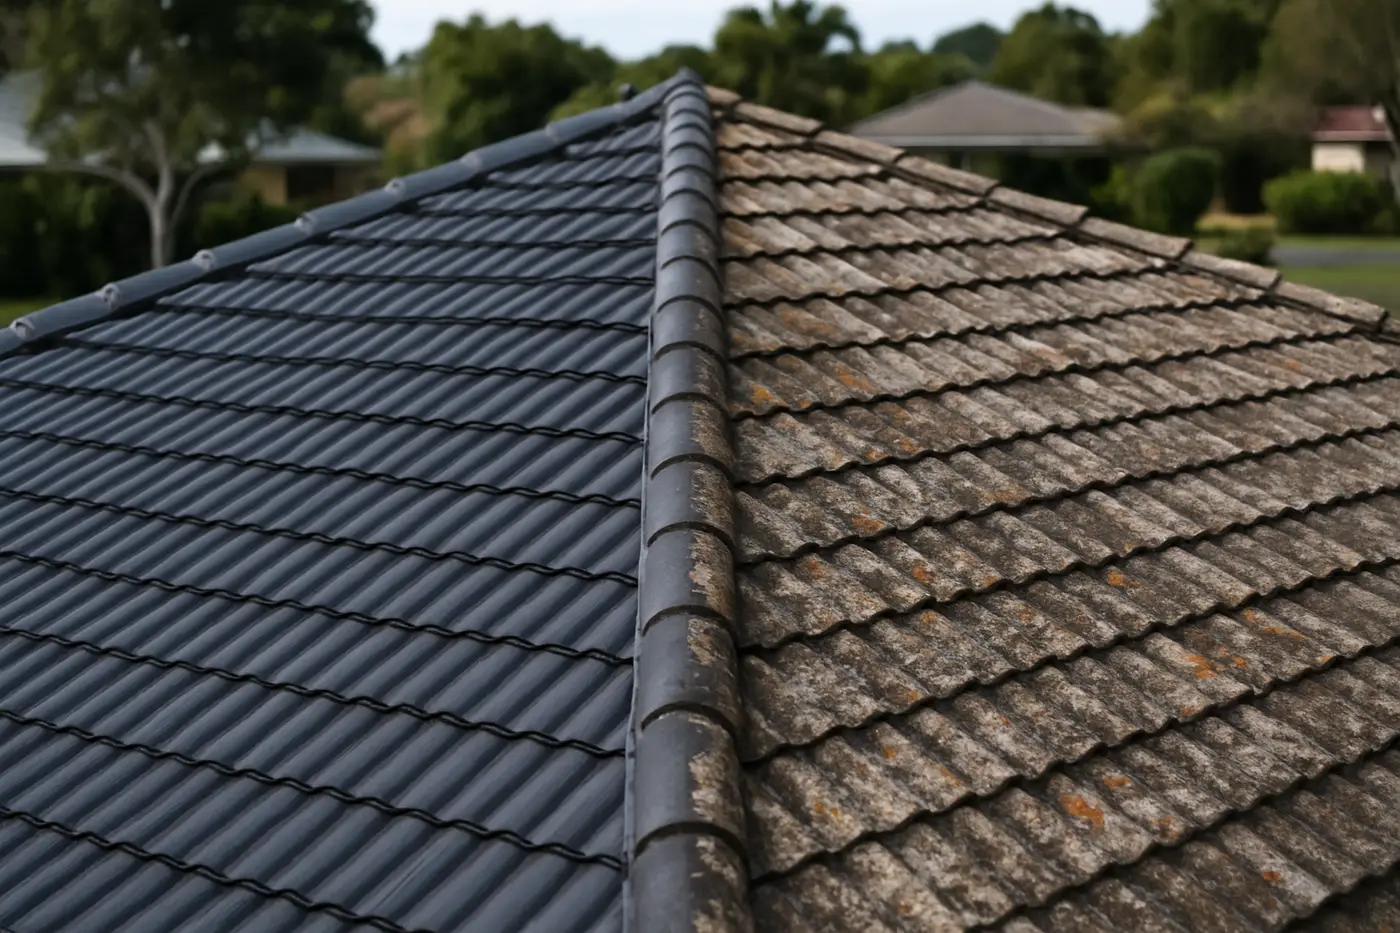
How we fix it
About this service in Brisbane
Drive through Aspley, Carindale, Kenmore or any of Brisbane’s 1960s-80s suburbs and you can pick the restored roofs from the street: crisp colour, straight ridge lines, no green bloom on the southern face. The unrestored ones next door — same age, same tiles — look twenty years older, because concrete tiles don’t die at 50, but their surface and their mortar do.
That’s the honest case for roof restoration in Brisbane. It isn’t paint. It’s a structured process that fixes what’s failed, resets the wearing surfaces, and buys a sound roof another decade or more of service for a fraction of what replacement costs.
What a full restoration actually includes
The word “restoration” gets stretched to cover everything from a proper six-stage job to a pressure wash and one coat of paint. Here’s the full process, in order, and why the order matters.
1. Inspection and photo report
Every restoration starts on the roof and in the ceiling cavity. We photograph every ridge, valley, flashing and penetration, check the sarking and timbers from inside, and put it all in a written report with a fixed quote. Two outcomes matter here: you see exactly what you’re paying to fix, and if the roof is too far gone to restore honestly — tiles crumbling underfoot, rust through the sheets — we tell you that instead of coating over it.
2. Repairs
Cracked, chipped and slipped tiles are replaced. Valley irons and flashings that have rusted out are swapped. Leaks get traced and fixed properly. Any coating applied over unrepaired damage is cosmetic — the membrane hides the cracks from you, and the water keeps finding them.
3. Rebedding and repointing
Ridge and hip capping on Brisbane’s older tile roofs sits on a mortar bed finished with a pointing layer. Fifty years of thermal cycling — scorching days into cool nights, over and over — cracks the pointing and crumbles the bedding. You’ll see the evidence as grey rubble in your gutters. We rebed the capping where the mortar has failed and repoint the lot with modern flexible pointing compound, which moves with the roof instead of cracking like the original rigid mortar did. On many Brisbane roofs this stage alone stops the leaks. (It’s also available as a standalone job — see roof repointing.)
4. Pressure clean
A 3,000+ psi clean strips moss, lichen, dirt and the chalky remains of the original tile surface. Brisbane’s humidity makes this stage non-negotiable: the shaded southern face of most tile roofs here carries active lichen colonies, and their root structures hold moisture against the tile and destroy coating adhesion. Cleaning happens after rebedding, so the new pointing isn’t blasted, and before any coating, because membranes only bond to clean substrate.
5. Sealer / primer
Porous, freshly cleaned concrete tiles drink paint. The sealer coat locks the surface and gives the membrane something to key into. On metal roofs this stage is a rust-inhibiting primer over treated spots and bare metal. Skipping the sealer is the classic shortcut behind restorations that peel in two or three summers.
6. Two membrane topcoats
Two full coats of acrylic roof membrane, spray-applied at the manufacturer’s specified spread rate, in your chosen colour from the Colorbond-aligned range. Two coats isn’t marketing — it’s what the warranty requires and what UV resistance depends on, and Brisbane UV is brutal on single-coat jobs. Lighter colours are worth a thought here: they measurably drop ceiling-cavity temperatures through a Brisbane summer.
Tile and metal roofs restore differently
Concrete tile is the classic Brisbane restoration candidate — the brick-and-tile stock built from the 1960s through the 1980s. The tiles themselves usually have decades left; the pointing, valleys and surface don’t. Full six-stage process applies.
Terracotta on interwar homes and ashgrovians is a different conversation. Good terracotta often doesn’t need coating at all — its fired surface outlasts any paint — so restoration there usually means repairs, rebed/repoint and a clean, and we’ll say so rather than sell coats the roof doesn’t need.
Metal roofs substitute their own steps: every screw replaced with Class 4 fasteners, rust converted and primed, unsalvageable sheets swapped, then primer and two topcoats. Older galvanised roofs on Queenslanders can come up remarkably well — but rust through the sheet is a replacement conversation, not a restoration one.
When restoration beats replacement — and when it doesn’t
Restoration wins when the structure is sound and the problems are surface-level and spread out: perished pointing, porous tiles, faded colour, scattered cracks, surface rust. At $3,500-$8,000 against $18,000-$45,000+ for replacement, a restored roof that gives you 10-15 years is easily the better spend.
Replacement wins when the failures are structural or material: tiles so brittle they crack under a roofer’s foot, corrosion through metal sheets, sagging battens, or a roof that’s already been coated twice and has nothing left to bond to. Roofs still carrying unrepaired damage from the November 2014 hailstorm sometimes fall in this camp — a decade of water past fractured tiles can quietly rot battens and sarking.
The inspection settles it either way, and the photo report is yours to keep — take it to three other roofers if you like. If your roof is a restoration candidate, the best window is Brisbane’s dry season, May to October, when coating schedules don’t fight the afternoon storms. Book the free inspection online and start with the report.